8 Google Earth Engine Account Setup Guide
Before attending the Google Earth Engine (GEE) sessions, please complete the account registration process detailed below. It is highly recommended to use your institutional/university email (e.g., student or faculty account) if available, though a personal Google account is also acceptable.
8.1 🎥 Video Tutorial
8.2 Step-by-Step Registration Guide
Follow these steps to register your GEE account for academic and non-commercial use.
8.2.1 Step 1: Access Registration Portal
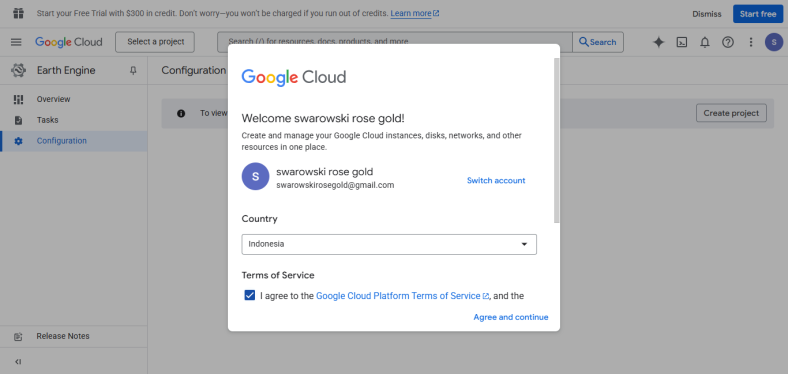
Go to the official GEE registration link: code.earthengine.google.com/register.
- Select your country/domicile.
- Accept the Google Earth Engine Terms of Service.
- Click Agree and continue.
8.2.2 Step 2: Google Cloud Configuration
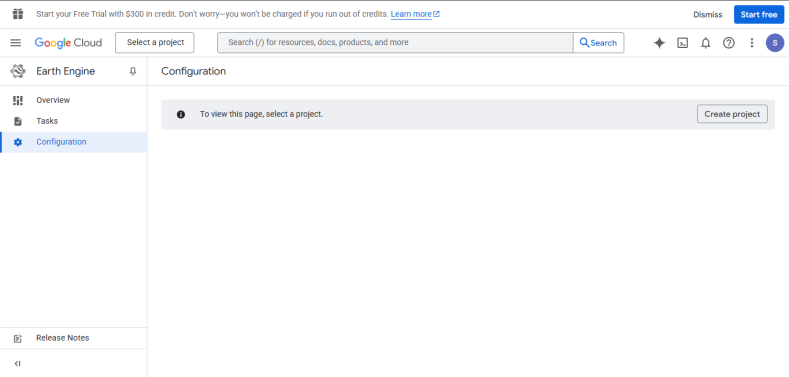
You will be directed to the Google Cloud configuration page.
- Under the Configuration menu, click on Create Project (or select an existing cloud project if you have one).
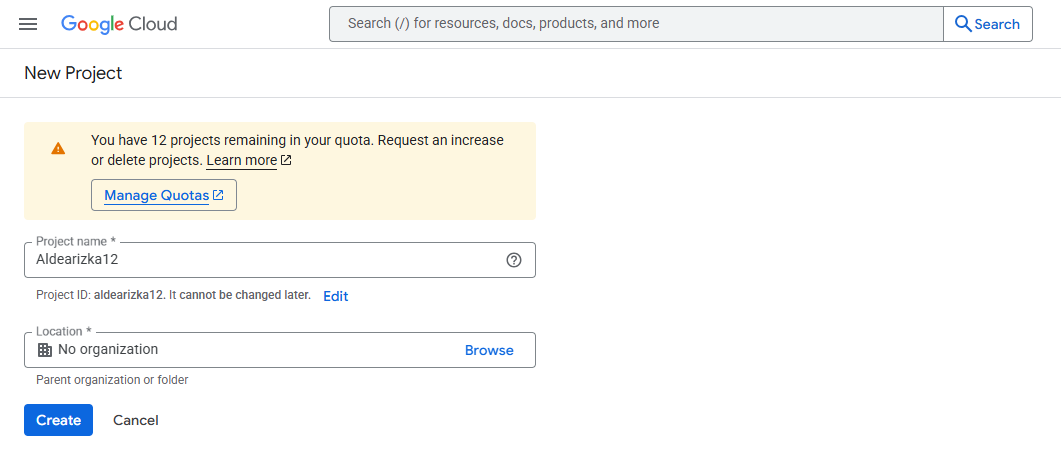
Google Cloud Project Configuration Menu
8.2.3 Step 3: Create a New Project
Configure your new GEE Cloud Project:
- Enter a Project Name tailored to your preference.
- Specify your organization/university details if your account is affiliated; otherwise, you can leave it empty or skip it.
- Click Create.
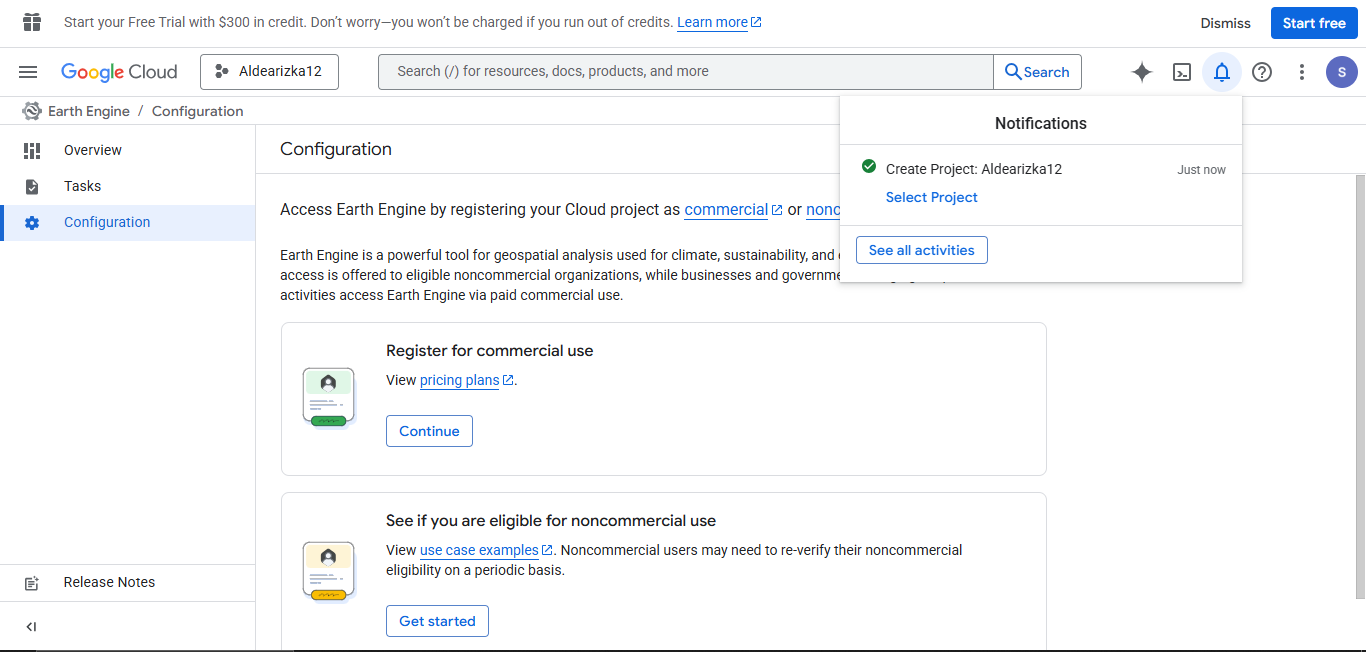
New Cloud Project Details Form
8.2.4 Step 4: Define Project Purpose
On the next screen:
- Choose the project’s purpose and declare that the account will be used for non-commercial purposes.
- Click Continue.
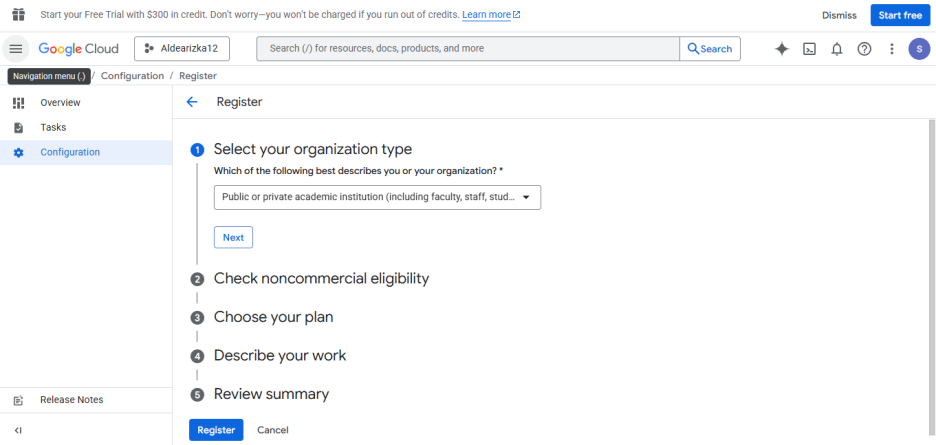
Declaring Project Purpose & Intended Use
8.2.5 Step 5: Fill in Personal & Academic Details
Provide your personal details for registration verification:
- Fill in your name and organization/university details.
- Ensure that your application description highlights academic, educational, or research (non-commercial) use.
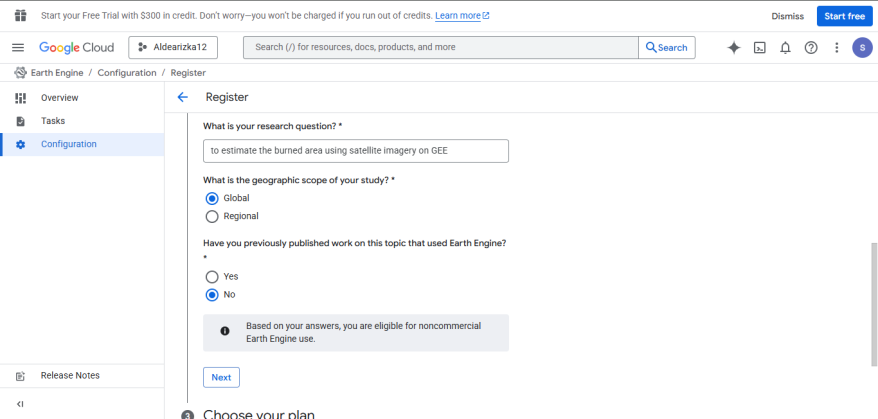
Academic Registration Details Form
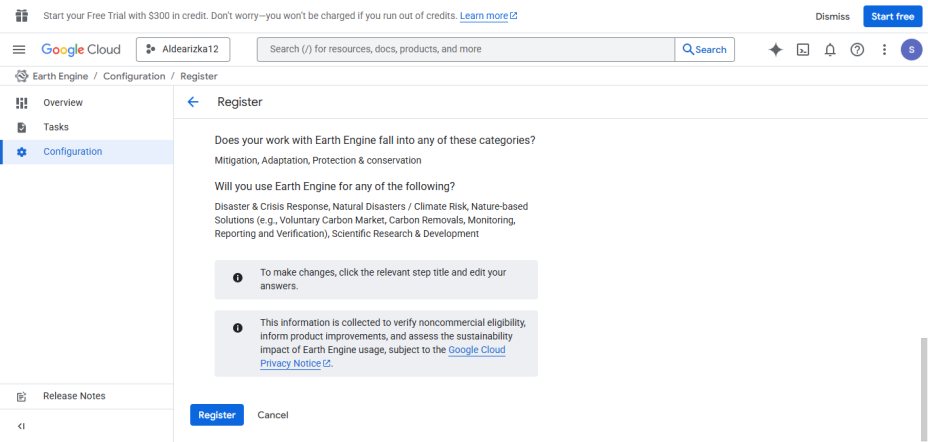
8.2.6 Step 6: Review Eligibility & Submit
Review your input:
- Confirm that the evaluation status shows your account is eligible for non-commercial access.
- Click Register.
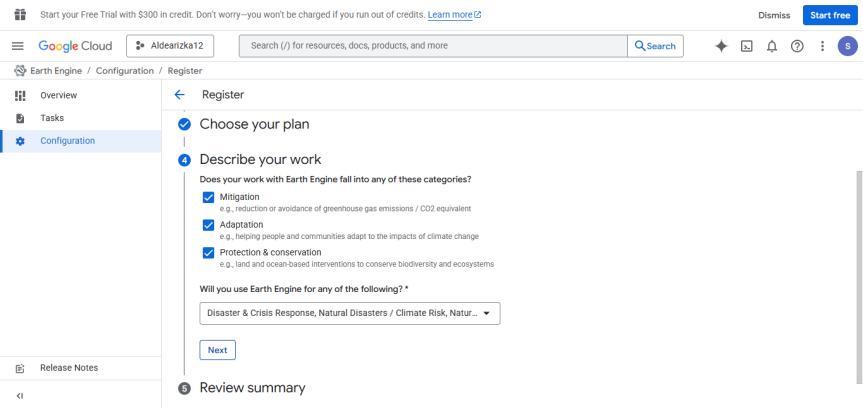
Reviewing Non-Commercial Eligibility Status
8.2.7 Step 7: Enable Required APIs
A pop-up modal asking to “Enable required APIs” will appear:
- Check the Enable checkbox to allow GEE to activate the required Cloud APIs.
- Wait for the initialization process to complete.
Enabling Required Cloud APIs Modal
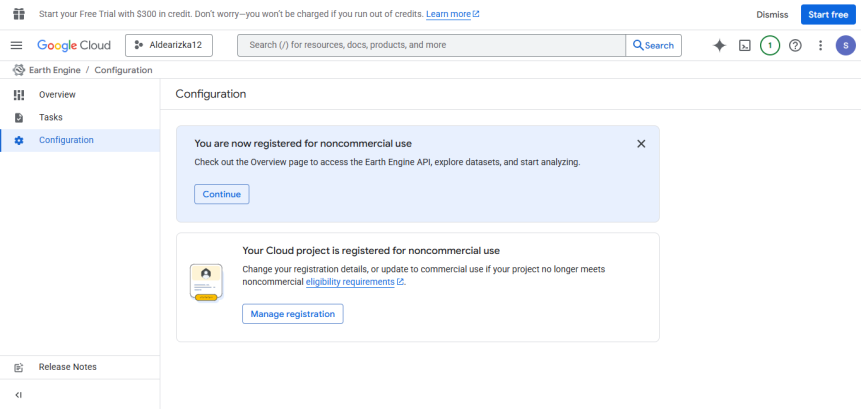
8.2.8 Step 8: Registration Confirmation
Once the API activation is completed:
- Verify that your account has been successfully registered.
- Click Continue to go to GEE.
Registration Successful Confirmation Page
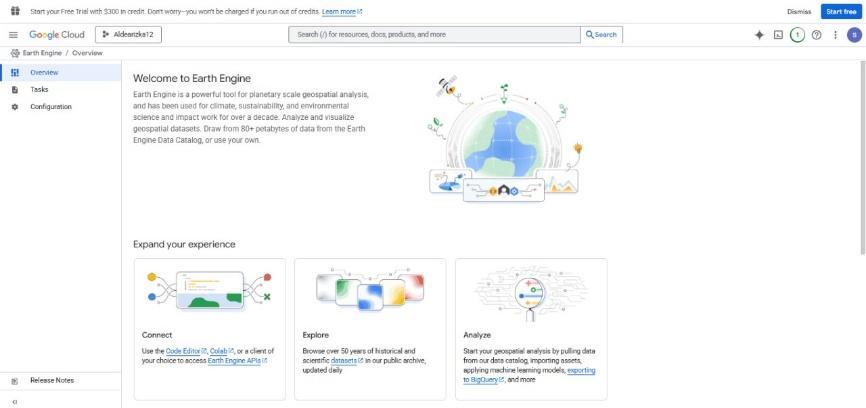
8.2.9 Step 9: Launch Code Editor
On the options dashboard:
- Under the “Expand your experience” section, click on Code Editor to launch the coding console.
GEE Options Dashboard - Accessing Code Editor
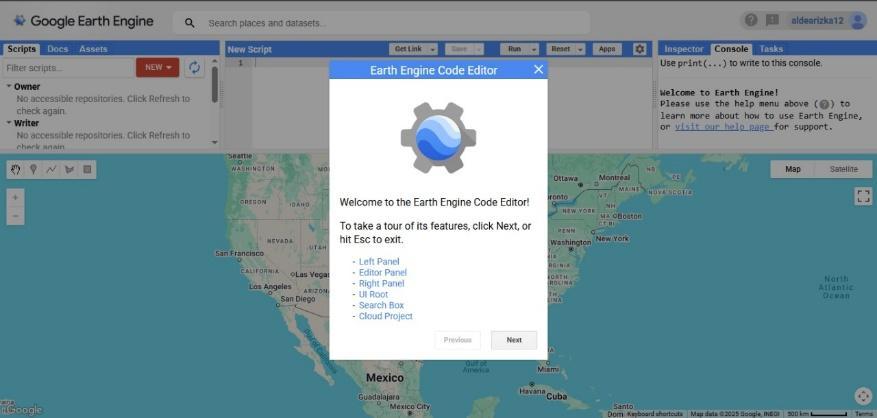
8.2.10 Step 10: Welcome to GEE!
The Google Earth Engine Code Editor interface will load. You are now ready to start scripting and analyzing geospatial data.
Google Earth Engine Workspace and Code Editor
8.3 📄 GEE Account Setup Guidebook
The complete Google Earth Engine Account Setup guidebook is available below for reading and download:
Open Guidebook in Google Drive
Original tutorial created by Aksara Lab IDN (PT Aksarakan Bhumi Indonesia). Translated and adapted for the International Summer Course Biotrop 2026.